


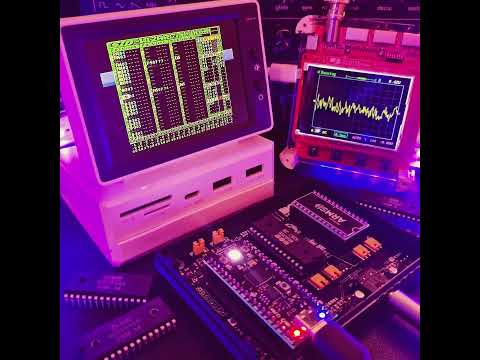
For many of us retro enthusiasts, the Commodore 64’s MOS Technology SID chip (6581 and 8580) is regarded as one of the most iconic sound chips in audio history.
(Modern) Software emulation gets close, but nothing truly replaces the analog filters and warm distortion of real vintage hardware.
I am LouD (short for loudness) and I created USBSID-Pico to bridge real SID silicon directly to modern workstations, phones, and media players over USB (CDC/WebUSB/WebSerial), MIDI, ASID and in the future possibly WiFi and Bluetooth.
Powered by the Raspberry Pi Pico microcontroller series (rp2040 and rp2350), the board acts as a flexible controller for up to two (and soon four) physical SID chips or modern hardware replacements.
What follows is my journey (as far as I remember) and attempt at creating a project build log detailing the start and evolution from early prototypes to the open-source hardware powering the retro audio experience for (at least some) enthusiasts today.
The before
For as long as I can remember I have been interested in how things work.
From the first Commodore 64 my parents bought, the first XT PC we owned at home, to the first Pentium PC I bought when I was a teenager, up until today (and beyond) where I work as software engineer.
Tech fascinates me, so when I have the option I like to pry it open, find out how it works and put it back together with "improvements" not caring (at first) if it still works.
I'm not much of a musician but do like to listen to all kinds of music, including chiptunes of course ;-)
Inspired by my older brother who repairs Commodore 64s among other things, a new project idea popped into my head. I wanted to see if I could create a SID playing device to listen to the SID tunes I already listened to on my computer and maybe even play them through a real SID chip.
Around February/March of 2024 I came across a github repo that let you create a SID player based on a Raspberry Pi Pico called SIDPod.
I liked how simple it seemed to use a microcontroller to play SID files so of course I had to build it.
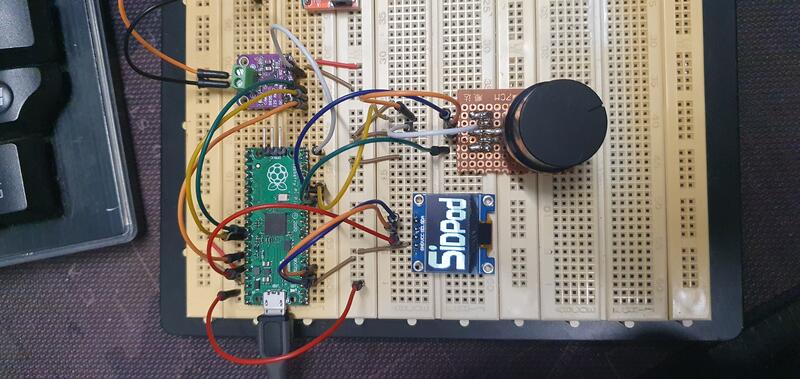
SIDPod testbuild
The way of adding more SID files to SIDPod's flash made me try and add an SDCard to the already great design, this resulted in SIDPod-SDCard.
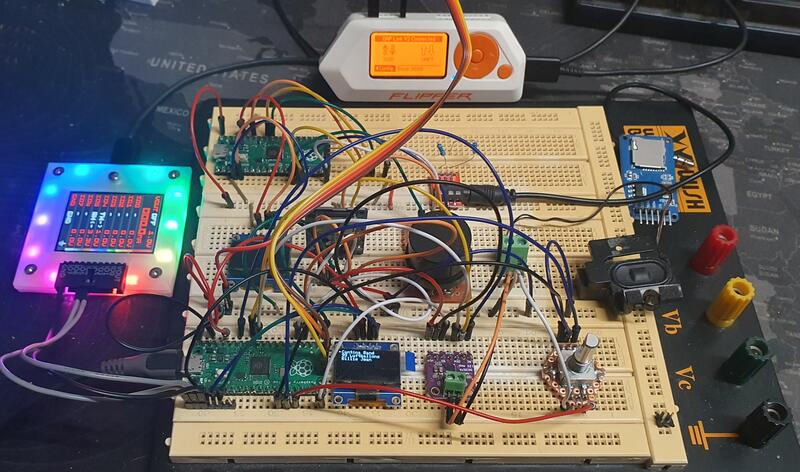
SIDPod-SDCard testbuilds
In early April 2024 still not satisfied by the results I found ESP32-SIDView.
This seemed like a nice replacement SID player for SIDPod with the added benefit of supporting real SID chips!
Building one was the logical next step, but since I did not own any real SID's at that time I had to find one.
SIDKICK-pico was the first SID replacement I found, no schematics, but orderable.
Having some hobby level experience in hardware reverse engineering I recreated a schematic and figured out the Pico to DIP-28 pinout so I could use it on a breadboard.
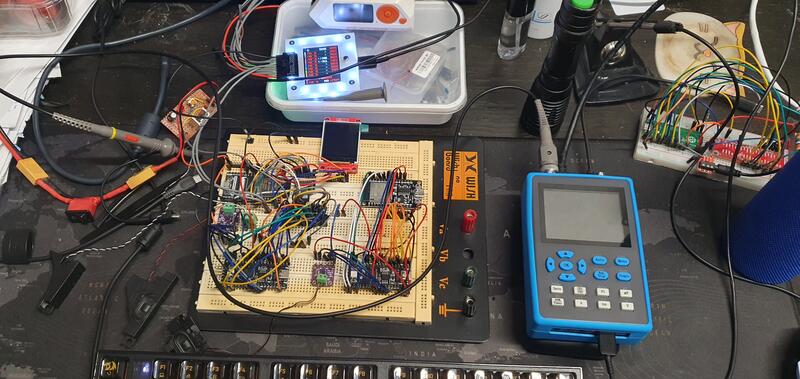
ESP32-SIDView testbuild
Not being satisfied with the spaghetti you can see in the picture above, I had to tidy things up a bit.
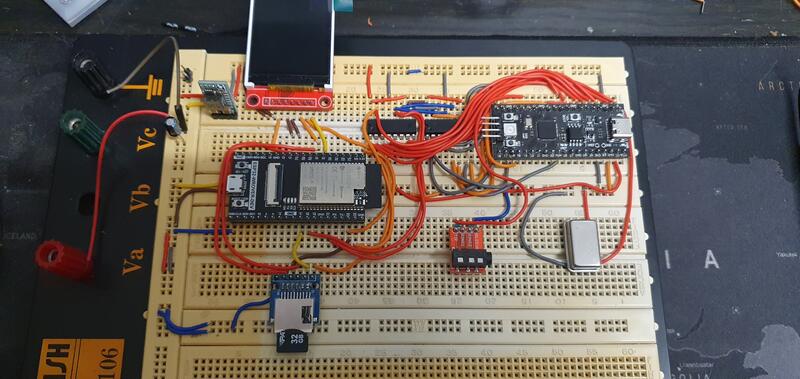
ESP32-SIDView tidy testbuild
Having some issues getting ESP32-SIDView to work, I contacted its developer tobozo through GitHub. We exchanged countless messages about this project on GitHub. We later moved to a different platform and continued talking (and still do) about his and my project(s), coding, cats, daily life etc. This one GitHub issue lead to a - if I may say so - great digital friendship.
In the meantime I also found SidBerry. A linux based console application for playing SID tunes via the Raspberry Pi's (not Pico) GPIO pins.
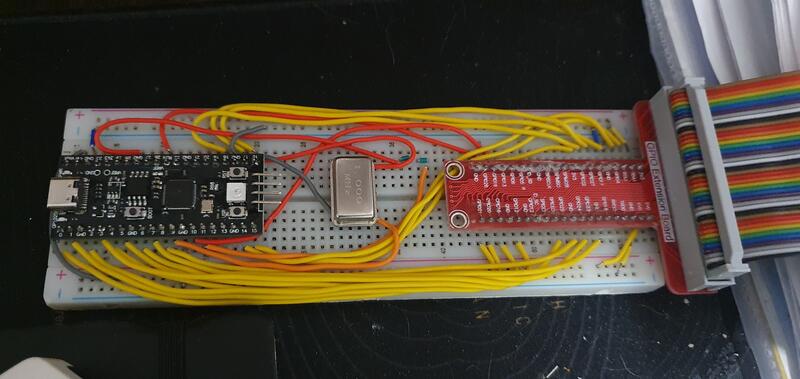
RPI breadboard extension with SKPico
SidBerry with Raspberry Pi is what in early May of 2024 eventually led to the creation of FTDI USBSID, my first try at creating a USB controlled SID device. To do this I used a FTDI FT223HL breakout board I already owned for reverse engineering.
Somewhere in between I acquired a v0.1 SIDKICK-pico and 2 half broken MOS6581's.
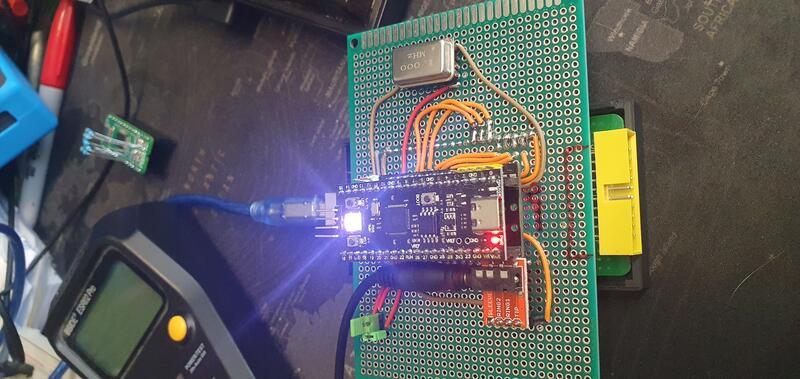
FTDI USBSID
Creating your own hardware supporting board meant also creating software support.
Reminiscing about that, here are the links:
The project
Using the FTDI breakout board came with a lot of limitations.
It wasn't a microcontroller, so all the GPIO writes and input/output switching had to be done in the driver and using the FTDI ecosystem wasn't really something I enjoyed.
By the end of May 2024 having had enough of these limitations is what led up to creating USBSID-Pico, or actually called PicoUSBSID at that time. A perfboard version with support for a single SID.
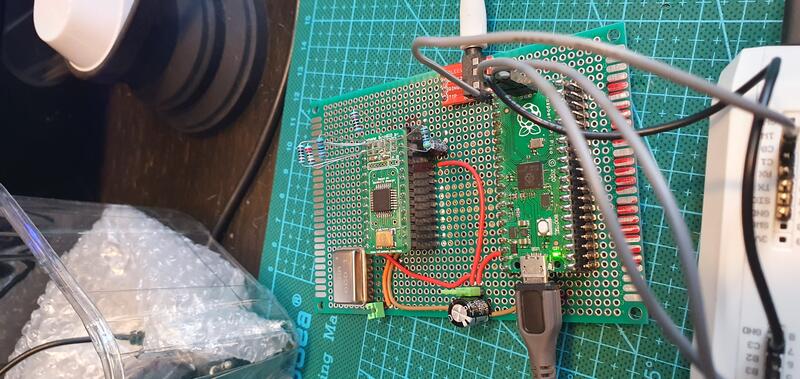
PicoUSBSID single SID version
Halfway through June of 2024, I added dual SID support to the same perfboard.
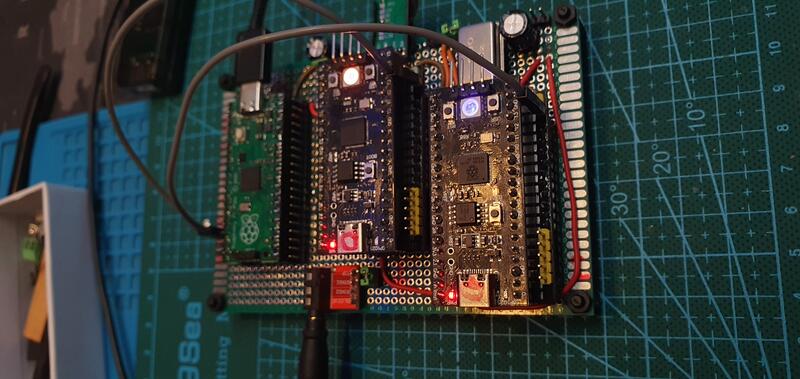
PicoUSBSID dual SID version
With the continued support and encouragement of tobozo (thanks m8) the first actual USBSID-Pico v0.1 board came to life that lead up to the first v1.0 board.
What followed has been an incredible journey of creativity, acquiring new skills, improving existing skills, learning new things and making new friends (and enemies?).
I talked to and met so many new people and groups, that it is almost impossible to name them all here but I have tried to name at least a few that inspired me in the credits at the end.
Key Technical Highlights (v1.0):
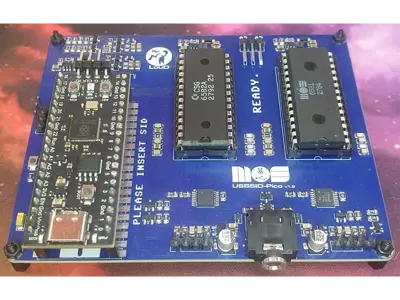
- Dual-SID fixed voltage socket support (6581 or 8580 MOS chip alongside hardware replacements like Swinke SID, FPGASID, and ARMSID).
- Multi-protocol connectivity via native USB, WebUSB (browser playback), USB-MIDI, and ASID stream protocols.
- Cross-platform support spanning Windows, macOS, Linux, Android, and AmigaOS.
- OSHWA Open Source Hardware Certification (NL000035).
- Schematic and PCB designs made available open-source via the github repo and via PCBWay to enable community self-assembly.
v1.3 Upgrades:
- Mixed SID Setups: Allows simultaneous mixing of different chip generations (e.g., pairing a 12V 6581 in socket 1 with a 9V 8580 in socket 2).
- Hardware Audio switching: Added digital switch to toggle between mono and true stereo (Socket 1 over left, Socket 2 over right) output directly on the board.
- OSHWA Open Source Hardware Certification (NL000045).
- Schematic and PCB designs made available open-source via the github repo and via PCBWay to enable community self-assembly.
v1.5 Upgrades:
- 100% Jumperless Voltage Control: Automatically senses and sets correct supply voltages (9V vs 12V) based on the seated chip, protecting rare SID silicon from overvoltage damage.
- Automatic switching: Based on the socket voltage, the filter capacitors, audio shunt resistor and digiboost resistor are automatically enabled and disabled.
- Expanded Footprint: Slightly widened board dimensions to accommodate optional dual ZIF (Zero Insertion Force) sockets.
- Better compatibility: Generous spacing added to fit larger hardware replacements like the FPGASID without mechanical interference.
- Upgraded Audio protection: Extra audio input protection by added pulldown resistors when no plug is in the audio jack and added ESD diodes on the audio input.
- Schematic made available via the github repo to enable community self repair.
Pro Roadmap Features (undecided):
- Quad-SID support (sockets for 4 hardware SID chips).
- High-grade audio routing and lower noise floor for studio recording.
- Dedicated MIDI input port
Hardware timeline
So many things have happened since I started this project. To give you an idea of the (hardware) development process starting at v0.1, here is a summarised timeline.
- May 2024: Single SID perfboard version.
- June 2024: Dual SID perfboard version.
- July 2024: v0.1
Unreleased iteration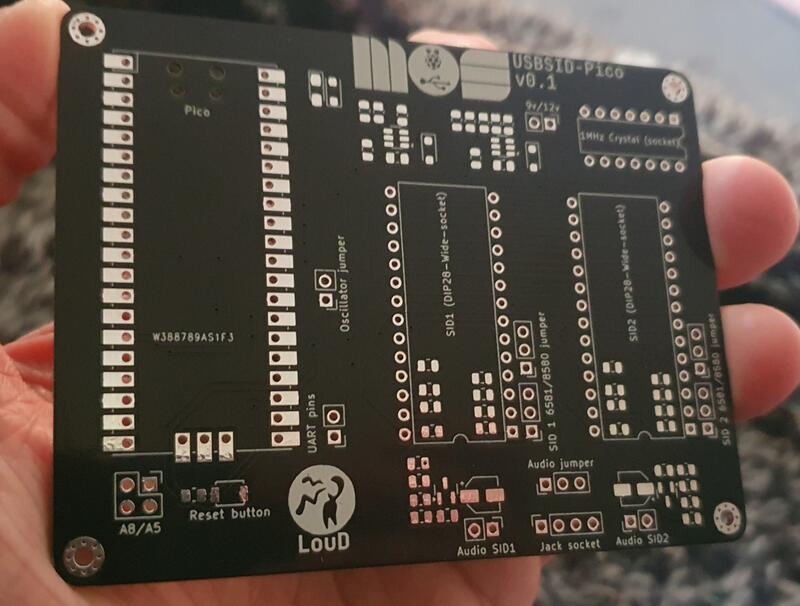
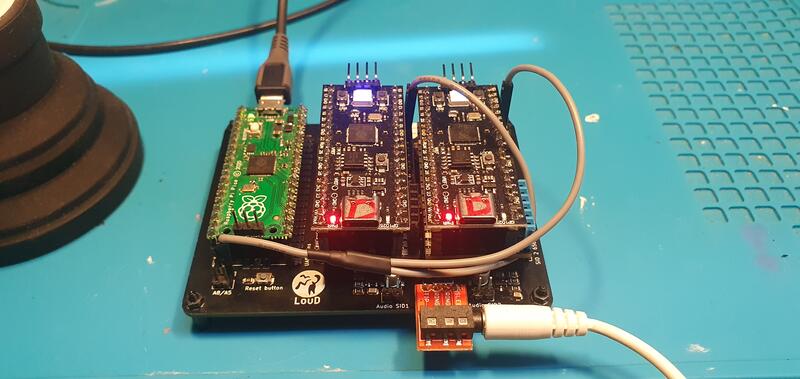
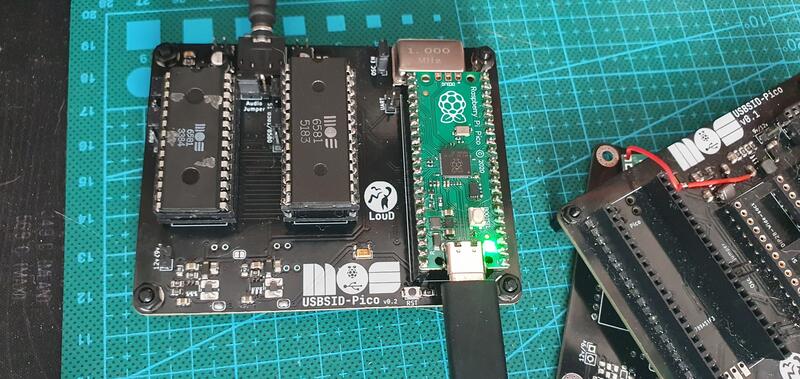
- August 2024: v0.2
Unreleased iteration with revised audio output.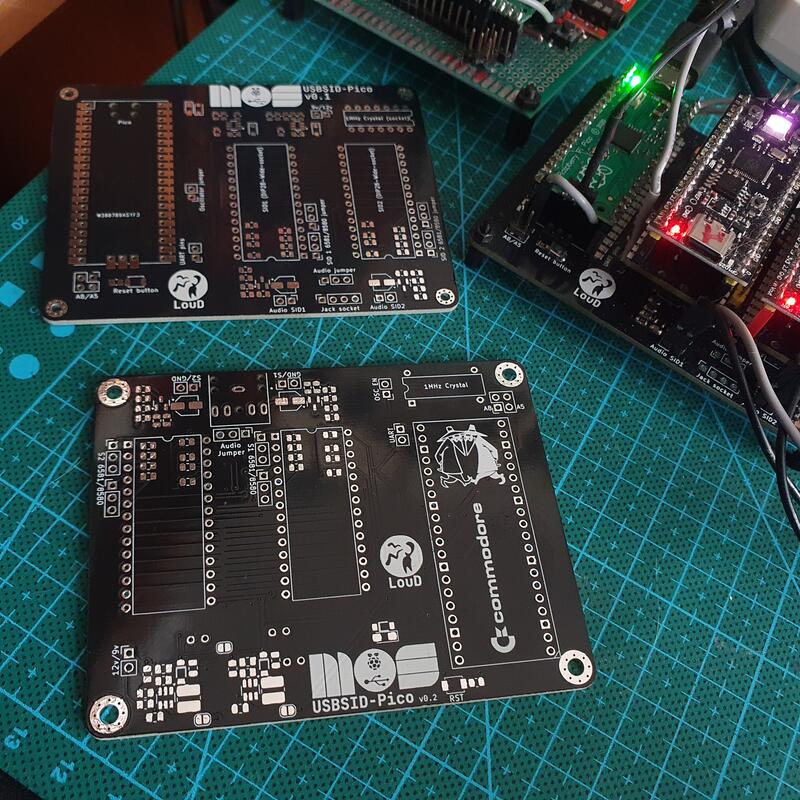
- October 2024: v1.0
After several printed circuit board iterations, USBSID-Pico v1.0 is officially launched.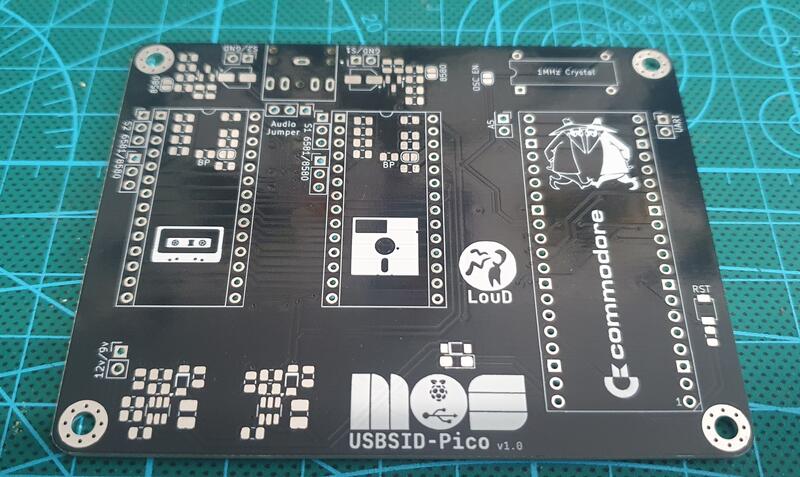
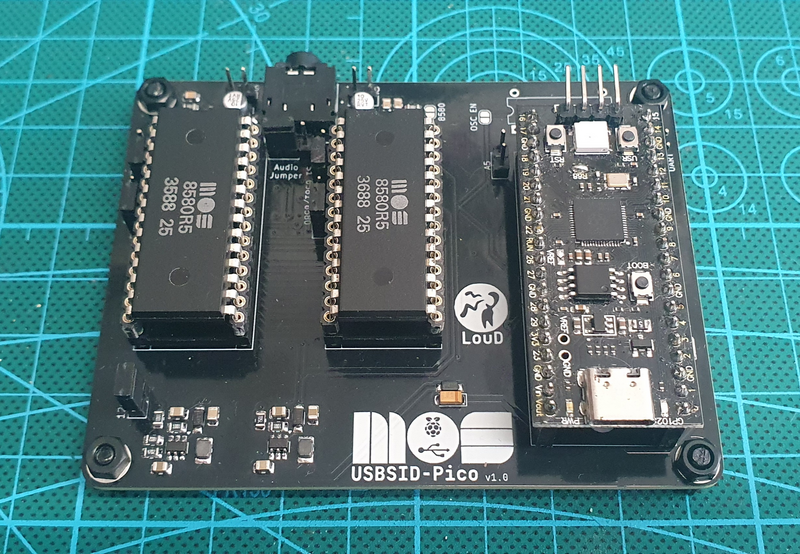
- February 2025: v1.1
Discarded iteration. - March 2025: v1.2
Unreleased iteration. - April 2025: v1.3
Official release of v1.3 hardware revision with mixed SID type support and refined audio configuration options based on community feedback.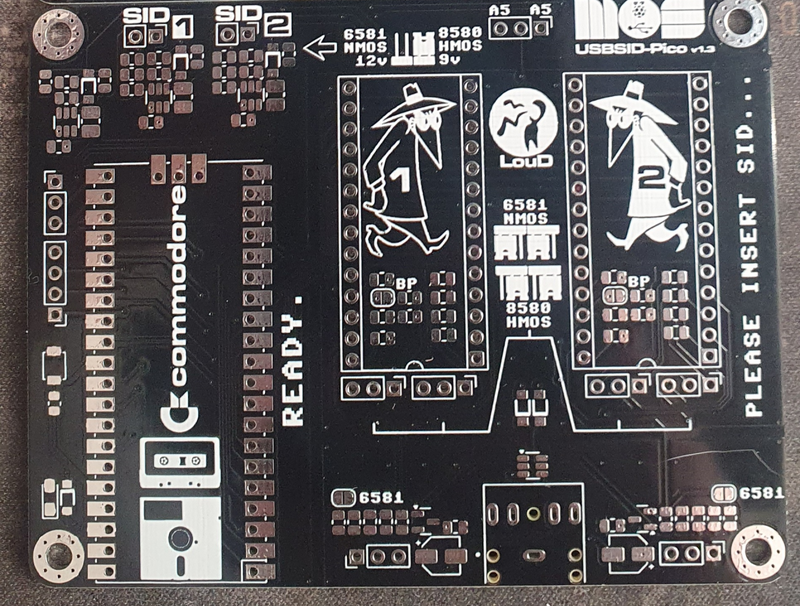
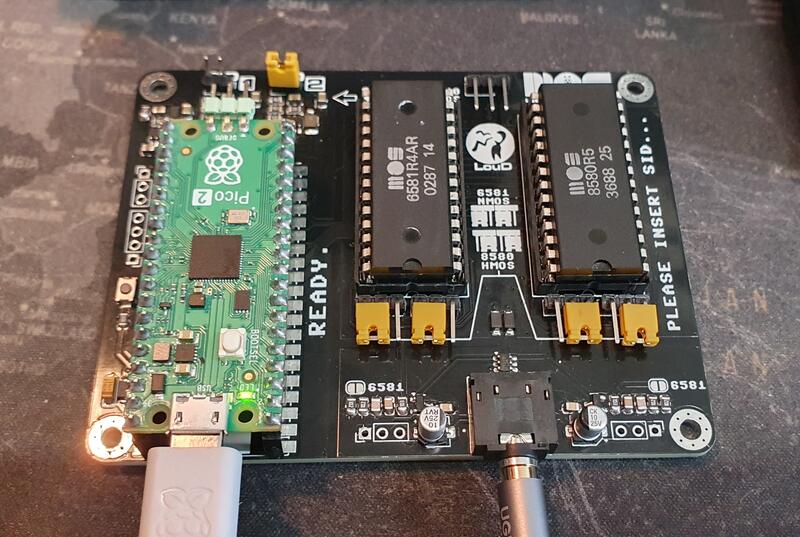
- March 2026: v1.4
Unreleased iteration. - July 2026: v1.5
Official release of v1.5 hardware revision that transforms board usability by eliminating dangerous manual jumper configurations and adds more board space for optional ZIF sockets.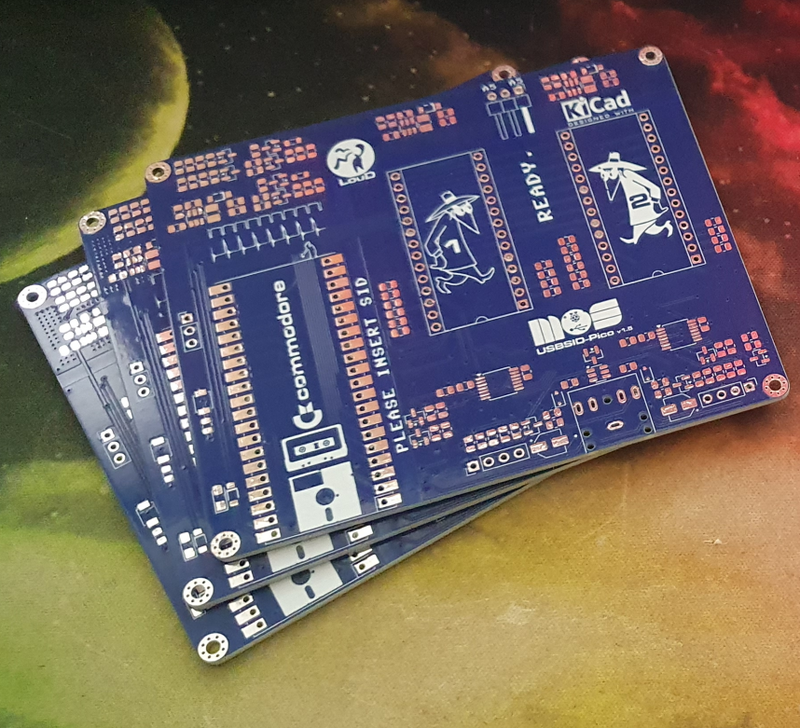
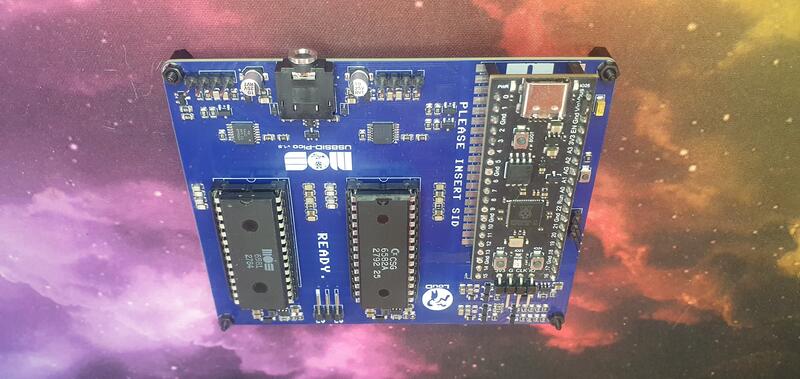
- Volume daughterboard
An optional accessory PCB, plug and play on v1.5+ boards (needs a small mod on v1.3), controlling left and right audio volume independently. It has its own hardware revision line and is licensed CC BY-SA 4.0. - Cases
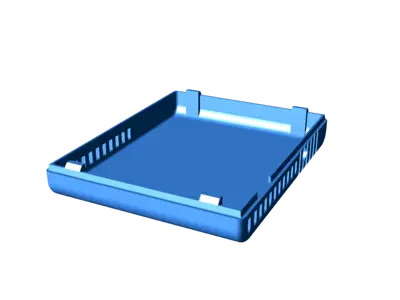
Community-designed cases exist for every PCB revision, from cartridge-style enclosures to a dual-board Commodore 64 case, all collected in the repo'scases/directory. - Late 2026 / Early 2027: USBSID-Pro Development (Target)
Work is currently underway on USBSID-Pro, designed specifically for musicians, audio producers, and SID chiptune purists.
Firmware
Developing new and unique PCBs to seat microcontrollers logically requires you to develop the firmware for said microcontrollers as well.
After having chosen a microcontroller you want to use, you actually need to get some experience with its SDK. This comes with pros and cons; you need to do a deep dive into the SDK of said microcontroller but also narrows your view in relation to other microcontrollers. Or at least, this is my experience, mostly because time is precious and you cannot do everything at once ;-)
Dual Core, Two Jobs
Before diving into the clock and bus tricks, it helps to know how the two ARM cores on the Pico actually split the work.
Core 0 always handles everything USB-related: CDC, WebUSB, MIDI, plus config management.
Core 1 on the other hand has multiple jobs, it runs the MIDI engine, the onboard emulator for SID play or Cynthcart when required, the SID tests if triggered by the user and handles the VU when not doing any of the other tasks. When Core 1 is busy handling the onboard emulator the VU is offloaded to Core 0.
Both cores can do SID bus writes because the actual writes are handed off to the DMA/PIO that do the timing-critical work described below.
Balancing the tasks between the two cores and relying on the DMA/PIO is what lets USB traffic, MIDI processing, or a config save happen without ever touching the cycle-accurate bus timing. If they shared a core, a badly timed USB interrupt could jitter the SID clock, exactly the problem the PIO offloading below is solving in the first place.
Technical Deep Dive: Precision SID Clocking & Bus Management via rp2040/rp2350 PIO
The primary challenge when controlling vintage MOS sound hardware over USB is timing precision. The MOS 6581 and 8580 SID chips do not utilize an asynchronous register interface; they rely on a strict phase clock to drive their internal switched-capacitor analog filters, voice envelope generators, and digital-to-analog converters.
Any jitter or frequency drift on the SID clock line results in audible tuning drift, harsh filter stepping, or broken sample playback (Digiplay).
To solve this without sacrificing system responsiveness, USBSID-Pico leverages the hardware Programmable I/O (PIO) state machines and Direct Memory Access (DMA) built into the Raspberry Pi Pico series (rp2040 and rp2350).
1. Generating a Low-Jitter 1 MHz System Clock
In standard PAL Commodore 64 computers, the SID clock runs at 0.985248 MHz (or 1.022727 MHz for NTSC systems). Modern USB controllers often approximate this using CPU bit-banging or standard PWM generators, but CPU interrupts from USB traffic can cause cycle slippage.
USBSID-Pico delegates master clock generation entirely to a dedicated PIO state machine:
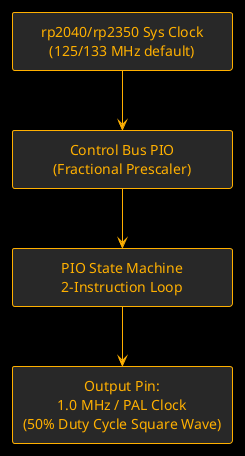
- Jitter Elimination: Because PIO state machines operate independently of the ARM Cortex cores, the clock signal remains completely cycle-accurate regardless of heavy USB packet transfers, MIDI processing, or configuration tasks running on the CPU.
- Flexible Frequency Control: The PIO fractional clock divider allows the clock output to be configured on the fly. The firmware can seamlessly generate a standard 1.000 MHz square wave, lock precisely to PAL/NTSC C64 frequencies, or scale the clock for custom hardware replacements.
- External Clock Fallback: On v1.0 boards, if an external oscillator is present (e.g., via jumper select), the PIO state machine can dynamically switch to read and pass through the external signal.
2. Cycle-Exact Bus Synchronization with DMA
Beyond driving the main clock, writing values to a real SID chip requires adhering to precise timing windows relative to PHI2. A register write requires setting up the Address Bus (A₀–A₅), Data Bus (D₀–D₇), and pulling Chip Select (C̅S̅) and Write Enable (W̅E̅) low for specific duration windows during the high phase of PHI2.
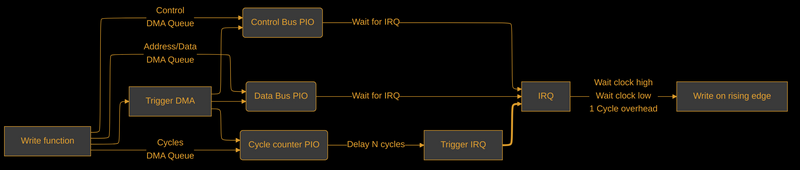
USBSID-Pico combines the PIO state machines with DMA buffers to achieve deterministic low-latency bus cycles, resulting in only a single clock cycle overhead:
- Buffer Queuing: Register write packets (from WebUSB, ASID, or USB-MIDI) are placed into DMA buffers almost directly from the USB stack.
- Bus Control: PIO state machine two controls the RW, and two C̅S̅ pins.
- Parallel Pin Mapping: A third PIO state machine handles the 8-bit data bus and 6-bit address bus simultaneously using mapped
SETandOUTpin targets in a single clock cycle. - Dead-Time & Setup Time Control: The fourth state machine program inserts exact cycle delays (
[delay]pre-ops) between asserting C̅S̅ - and driving data by triggering PIO-specific interrupts that assert the two state machines above, guaranteeing that chip setup times and hold times are satisfied without stalling the main processor.
One gotcha worth mentioning: all this only holds up at -O3. Drop the optimization level and the compiler generates just enough extra overhead around the DMA/PIO handoff to reintroduce timing slack, which shows up as broken sample playback in the embedded SID player and Cynthcart. So -O3 isn't a "nice-to-have" for this firmware; it's load-bearing.
Cycle-accurate you say? Prove it!

Wonderland XIII ending by Censor Design (2016)
(Played with MOS6582 on USBSID-Pico)
3. VU Meter Feedback
Not everything in the firmware is about getting bytes onto the SID bus correctly, sometimes you also just want the board to look alive.
The onboard LED (Pico/Pico 2) and, on the black clone boards with an onboard WS2812, the RGB LED, both act as a VU meter driven off the SID1 (default) voice data, calculated straight from the register writes going through. Which voices feed the calculation is configurable, so you can tune it to taste.
4. Automatic SID Model Detection
Not every socket gets told what's plugged into it, most of the time the firmware has to figure it out on its own. Real 6581 and 8580 chips (and most clones that bother to emulate the quirk) behave slightly differently around their envelope/waveform generator internals when you poke certain test bit sequences into the voice registers and read back what comes out of the oscillator/envelope readback register.
These aren't documented behaviors, they're quirks the C64 scene worked out and shared decades ago (methods like the ones on codebase64.net, and the detection routine from 1541 Ultimate's SID cart player). USBSID-Pico runs a few of these probes back to back per socket at boot (and on socket reconfiguration), cross-checks the results against each other since a single probe can misfire, and falls back through multiple detection methods until it's confident whether it's looking at a 6581, an 8580, or something it can't identify. Get this wrong and the firmware would apply the wrong voltage/filter assumptions to a chip that can't take it, so it's not just a nice-to-have feature.
5. Turning MIDI Into SID Register Writes
MIDI notes don't map onto SID registers by themselves. Someone has to decide what "note on, channel 3, velocity 100" actually means in terms of frequency registers, gate bits, and envelope settings, and then get those writes onto the bus in time to sound right.
The MIDI handler keeps a per-channel voice allocation table so incoming notes get assigned to a free SID voice slot, tracks note on/off and velocity, and layers an arpeggiator on top that steps through held notes on its own timer, calling the same note on/off path a human playing key by key would trigger. ASID messages come in through a completely different transport (MIDI vs a raw byte stream) but funnel into the same underlying register write path once decoded, so the bus timing code described above doesn't need to know or care which protocol asked for the write.
6. One USB Device, Several Personalities
From the host's point of view, USBSID-Pico shows up as a single USB device, but under the hood it's a composite of several TinyUSB interfaces stitched together with Interface Association Descriptors: a CDC interface for the custom SID protocol, a MIDI interface, and a Vendor (WebUSB) interface, all sharing one physical connection. Depending on the firmware build there can be extra CDC channels tucked in as well, one used for telemetry, another that exposes a plain USB UART.
Getting a composite device like that to enumerate cleanly across Windows, macOS, Linux, and Android, each with their own opinions about driver binding for multi-interface USB devices, turned out to be its own small adventure that doesn't show up anywhere in the SID bus code but ate plenty of debugging time all the same.
7. Config That Survives a Power Cycle
The board remembers its settings (which sockets are enabled, address ranges, clock speed, voltage mode, VU source, and more) across power cycles without running a filesystem. Flash is split at the linker level into a firmware region and a separate persistent storage region (the split is sized per platform in the rp2040 and rp2350 linker scripts), so writing a config update can never accidentally overwrite running code, and a firmware update never has to touch, or wipe, your saved config.
Software
When you create something new and shiny that requires the (hard) work of others to work, you need to prove yourself and your product worthy of integration into their holy grail. Very understandable.
Adding the first support for any application that is not your own requires you to learn the codebase and understand the coding rules the developer(s) of that application follow.
This is by itself a complete journey I am not going into here, below is the (current) list of (official/forked) applications that have support for USBSID-Pico.
The list with supporting applications for USBSID-Pico
I probably missed some of them
- USBSID-Player (cli) my own command line SID player, plays PSID/RSID/PRG/P00 files straight through the board without needing a full emulator
- deepsid (website) by Chordian, play SID files straight via WebUSB (Chrome), WebSerial (Chrome/Firefox) or ASID (WebMidi), no install needed
- Hippoplayer (website) multi format chiptune/module player with USBSID-Pico output support via WebUSB (Chrome) or WebSerial (Chrome/Firefox)
- USBSID Web config (website) my web based config tool, also doubles as a quick WebUSB (Chrome), WebSerial (Chrome/Firefox) and ASID (WebMidi) test player for your board
- Vice (3.10+) the C64 emulator, x64sc supports up to 4 SIDs through USBSID-Pico
- JSidplay2 (v4.13+) Java based SID player and C64 emulator, up to 3 SIDs
- Denise (v2.7+) Amiga emulator with SID playback support, up to 4 SIDs
- (lib)sidplayfp (v2.16+) the SID playback library (and its player) that a lot of other tools build on, up to 3 SIDs
- Acid64 Pro (v4.4.0+) Windows only commercial SID player, up to 3 SIDs
- Phosphor (any version) cross platform SID player, up to 4 SIDs
- sidfactory2 (release 20260308+) chiptune tracker/composer for writing your own SID tunes, MIDI/ASID output
- GTUltra (fork) my fork of GoatTracker Ultra with USBSID-Pico support baked in
- SidBerry (fork) command line SID player for Linux and Windows, up to 4 SIDs (Windows build is a bit buggy)
- Amiga playsid brings real SID playback to the Amiga through USBSID-Pico
- IneSID (website) by Fazibear, ASID (WebMidi) playback in your browser
- TrueSID a Python based graphical SID player built on JSIDPlay2/sidplayfp
- RetroDebugger (fork) unofficial support, up to 4 SIDs
- SID-Wizard for making your own chiptunes through Vice or RetroDebugger
Project spawns
As with adding support to applications of others, your hardware project usually has you spawning all sorts of custom software/repo's for said project.
The hardware needed a driver, this spawned the USBSID-Pico-driver repo which contains the official driver written in C++ and Java, plus a mirror of the driver used in Vice.
Because the board has configurable features, the CLI Configtool was spawned.
To accommodate for the less tech savvy users, the Web Configtool got spawned.
Some users would actually like a dedicated deskop application (GUI), spawning USBSID-Configtool written in my dayjob language Clojure.
I wanted a more direct way to test SID play on the board while also adding support as embedded SID player USBSID-Player got spawned.
But having an embedded SID player means you need a way to actually beam the SID tunes to the board, CLI SendSID was spawned.
In earlier firmware versions I spawned Adorable that added an embedded version of Cynthcart. This spawn was an adapted version of emudore.
Not every bit of software support came from me though.
sandlbn wrote and maintains a full Rust driver for USBSID-Pico, completely on his own initiative, which was pretty great to wake up to one day.
WilfredC64 also made a Rust implementation for USBSID-Pico specifically for Acid64 Pro.
Raros also built a custom Cynthcart VST for Windows to go along with the embedded Cynthcart firmware, you'll find it and his notes in the repo.
And of course none of this USB plumbing would work half as well without TinyUSB, which the firmware leans on for the whole USB stack.
SID's and hardware replacements
The good
During this project my collection of SID chips and hardware replacements kept growing, and still grows.
Any new hardware replacement that catches my eye is a new take my money.
Not only because I like to support the creator, but moreover that I want to add support for it to USBSID-Pico.
I admit that not all hardware replacements that I own are bought. Some are donated and/or traded for one of my boards, something I am always open to discuss!
The bad
I try to handle all my real SID chips with care and mostly use hardware replacements when doing the many firmware tests I do for USBSID-Pico. But I must admit that even I haven't always been careful enough, resulting in a fried SID (or two). And no, it doesn't smell nice; it's hot to the touch and doesn't taste like chicken!
The owned
In no particular order, here are the SIDs that I own and have tested/use with USBSID-Pico.
- MOS6581 ~ several different types
- MOS6582 ~ the 8580 wannabe
- MOS8580 ~ several different types
- SIDKICK-pico v0.1
- SIDKICK-pico SKpico2350DAC ~ Ultimate64 version
- FPGASID
- SIDEmu
- ARMSID
- ARM2SID
- BACKSID v1
- PDSID
- SwinSID
Art
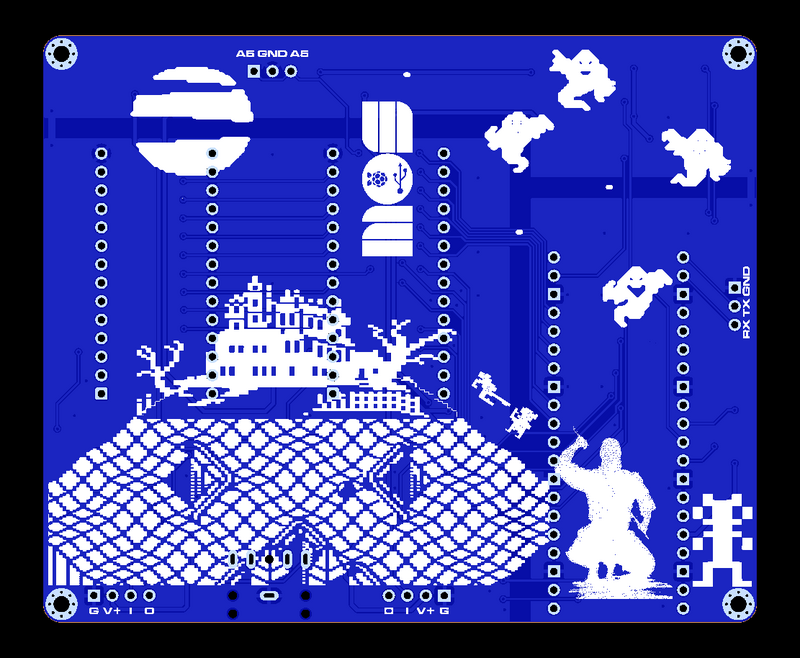
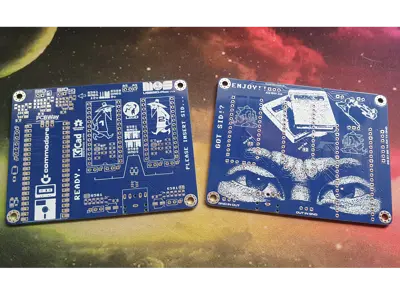
I'm a big fan of retro and pixel art, thus having some special art on the bottom of each board couldn't be skipped (and my friend tobozo forced me to add some).
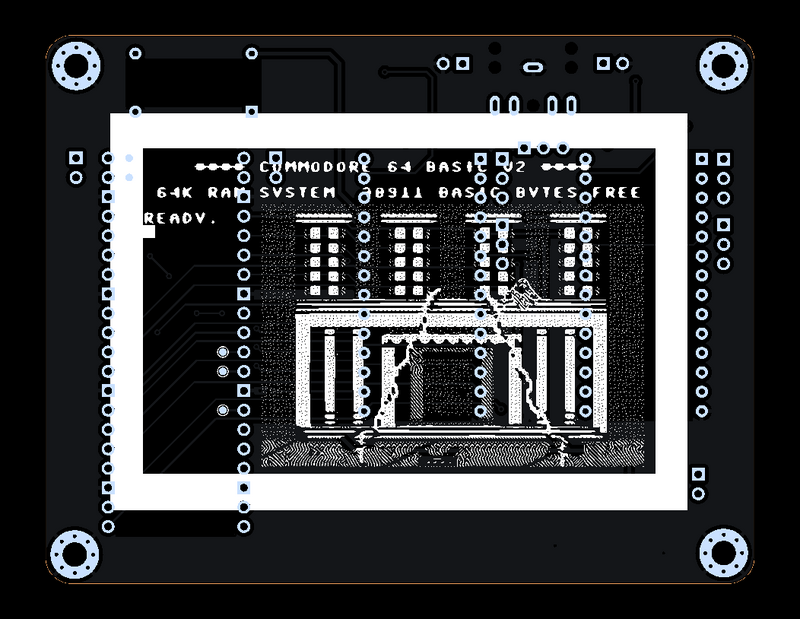
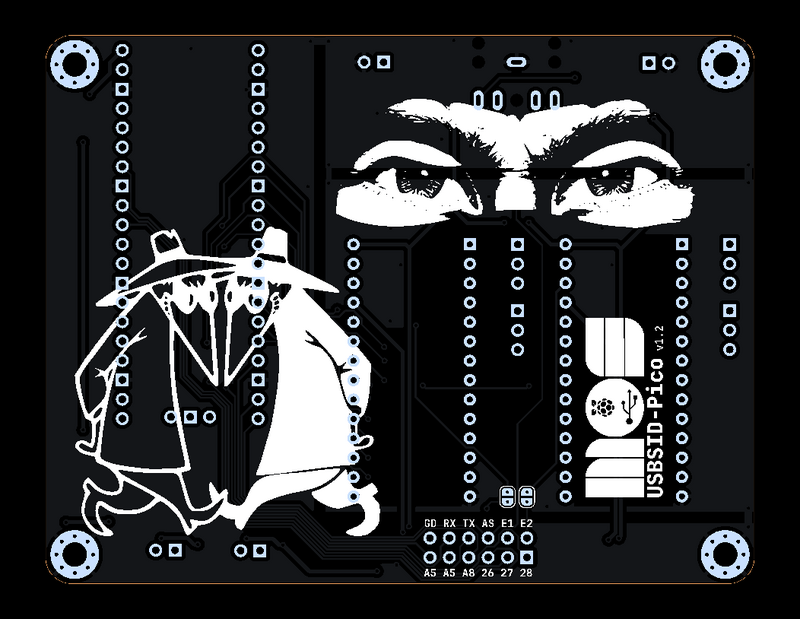
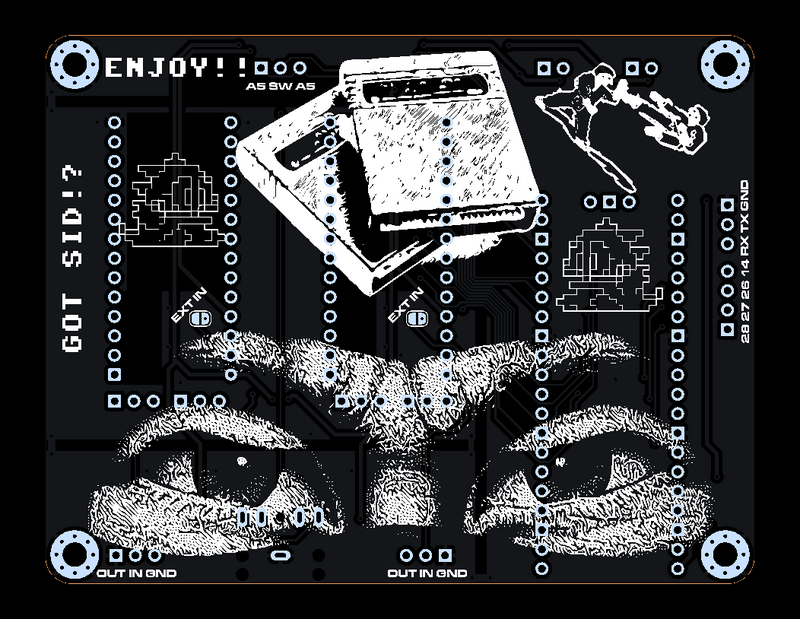
Swag
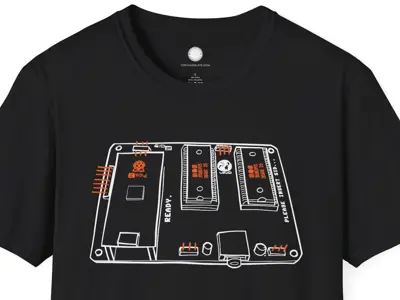
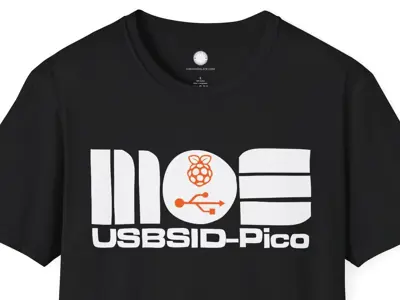
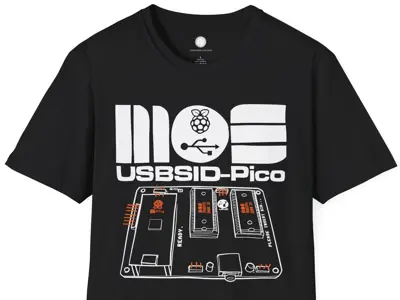
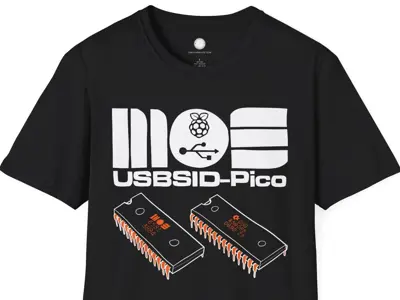
What can a product be without fanboy swag? The marvelous greyandslate offered to create some great t-shirt designs for free! after I asked him about creating something. How's that for exposure! The shirts are for sale in his Smallrun shop.
Press & Mentions
USBSID-Pico has popped up in a few places I didn't expect, always a nice surprise.
- HVSC (High Voltage SID Collection) news mentioned it a few times: June 2025, December 2025, and June 2026
- Mingo's Commodore Blog wrote it up in two parts
- Listed on acid64's links page
- The Vice support started life as an actual SourceForge patch ticket
- Commodore News covered it too
- And a couple more video mentions worth a watch: one, two
- It's also apparently notable enough to get a line on Wikipedia's MOS 6581 page (under "Hardware using the SID chip"), and its own page on both c64-wiki.com and c64-wiki.de
If you're searching around for more, "usbsid" and "usbsid-pico" turn up most of it.
Wrapping up
If you run into trouble or just want to talk shop, the Discord is where most of the day to day happens, GitHub Discussions works too if you prefer that. And if you're curious what's cooking next, the project board is kept reasonably up to date.
Or if you want to see (and hear) more of the board in action, my YouTube channel has plenty of demo videos, and there's a growing pile more on the SHOWCASE page of the main repo.
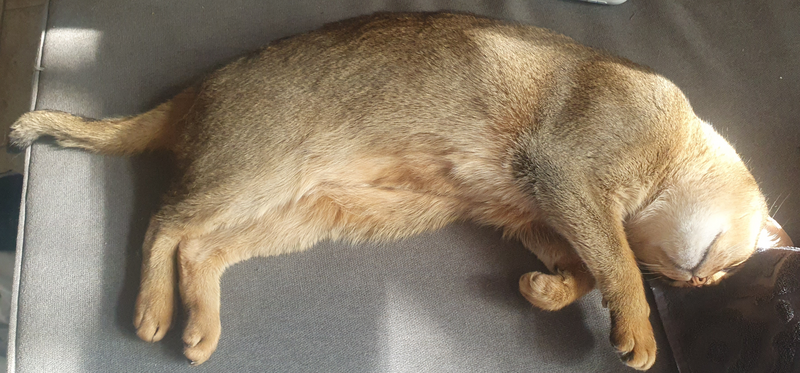
Here's a picture of my cat :-)
Note
When doing research for something you want to create you often come across similar projects that look like your idea but are not quite the same.
For me this has always inspired me to do what I do and of course sneak some previously proven ways of doing things into my own projects.
So while being a unique project, USBSID-Pico does relate to other great projects.
Special thanks
I want to thank tobozo for your continued support!
And my gratitude goes to spotUP for his persistence and believing in the project from the start!
LukHash and Nordischsound for their free promotion of USBSID-Pico.
WilfredC64 and Niels whom I both met at HCC Commodore Club who have been a great support and early adopters!
Gideon for tips on going jumperless and is also a member at the same club.
All other members of HCC Commodore Club.
Credits
I find that giving credit to other developers for their great projects is required, so in no particular order:
- frntc ~ SIDKICK-pico
- andi6510 ~ FPGASID
- DaemonPig ~ SIDEmu
- stg ~ SIDBlaster USB
- gh0stless ~ SIDBlaster USB Tic-Tac-Edition
- CBMretro ~ SIDBlaster USB Nano
- Thibaut Varène ~ ExSID and ExSID+
- Twisted Electrons ~ TherapSID
- Sensorium Embedded ~ TeensyROM
- PaulSlocum ~ Cynthcart
- kenchis ~ Jsidplay2
- Jürgen Wothke ~ webSID
- PiCiJi ~ Denise
- The Vice Team
- erique and koobo ~ Amiga playsid
- Chordian ~ deepsid
- greyandslate ~ Swag!
- sandlbn ~ Rust driver
- Raros ~ Cynthcart Ninja VST
- Fazibear ~ IneSID
- hathach and the TinyUSB project
- Gideon ~ 1541Ultimate
Links
All links from the text:
- SIDPod
- SIDPod-SDCard
- ESP32-SIDView
- SidBerry
- SIDKICK-pico
- FTDI FT223HL
- FTDI version of SidBerry
- FTDI version of Vice 3.8
- emudore
- Adorable
- v1.0 OSHWA NL000035
- v1.3 OSHWA NL000045
- Hackaday project page
- YouTube channel
- Rust driver
- Discord
- GitHub Discussions
- Project board
- USBSID-Pico
- USBSID-Pico-driver
- USBSID-Configtool
Disclaimer
I do this stuff in my free time for my enjoyment.
Since I like to share my joy in creating this with everyone I try my best to provide a working PCB and Firmware.
I am in no way an electronics engineer and can give no guarantees that this stuff does not break or damage your hardware, computer, phone, or whatever you try to hook it up to.
Be sure to take great care when inserting any real MOS SID chips into the board.
While everything has been tested with real chips, this is in no way a guarantee that nothing could go wrong.
Use of this board and firmware at your own risk!
I am in no way responsible for your damaged hardware.
That being said, have fun!
This blog is also available on the authors website
0 Comments
Sign in to leave a comment.